
VirtualBox is a very useful virtualization tool. You can use it to run multiple operating systems simultaneously, test applications, or simulate a production environment. I frequently use it to try out different operating systems, like Haiku or ReactOS.
If you haven't used VirtualBox before, setting up a guest operating is easy. In this post, we are going to create a virtual machine in VirtualBox. Although I used the VirtualBox Windows version to create my virtual machine, the process is very similar for VirtualBox in other operating systems, like in Ubuntu.
We'll use a live CD/DVD image to test the virtual machine we create. If you don't have a live CD/DVD image, head over to Ubuntu and download a copy of Ubuntu. This is the process we will follow.
- Create a virtual machine
- Change the virtual machine's default settings
- Start up the virtual machine and run the Ubuntu live CD/DVD
Create a Virtual Machine
Step One: Getting Started
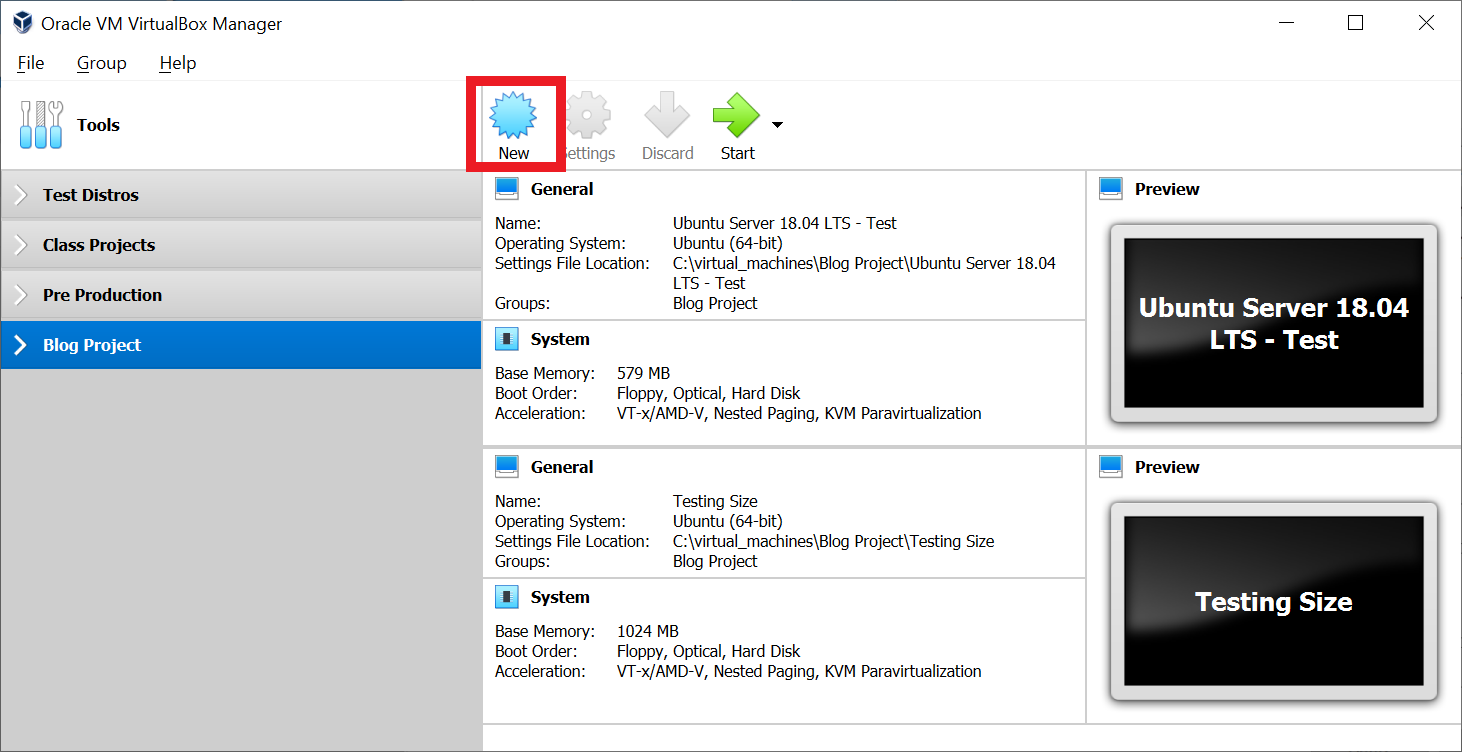
First, we need to create a virtual machine. Open VirtualBox, use the "Machine" menu and select "New" to create a new virtual machine to get started.
Step Two: Name and Operating System
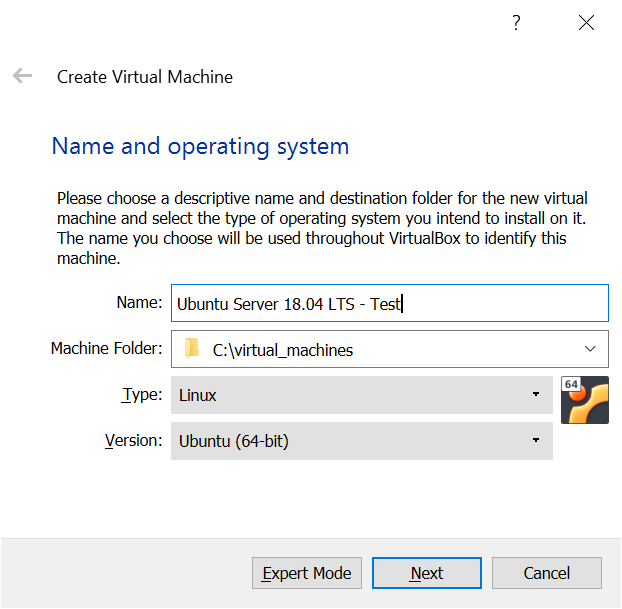
We will get a pop-up menu to create a new machine. In this pop-up menu we need to give your machine a name, select a folder to save the machine, select Linux as the "Type", and select Ubuntu (64-bit) as the "Version". Complete the required fields and click next.
Step Three: Memory Size
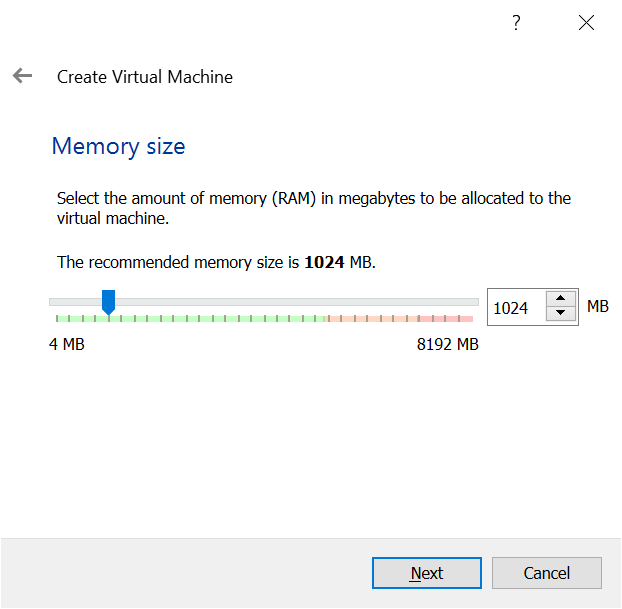
Next, we need to specify how much memory (RAM) to allocate to the virtual machine. The default value is 1024 MB (1 GB). We can change this in the virtual machine settings later. Click next to go to the virtual hard disk creation screen.
Step Four: Hard Disk
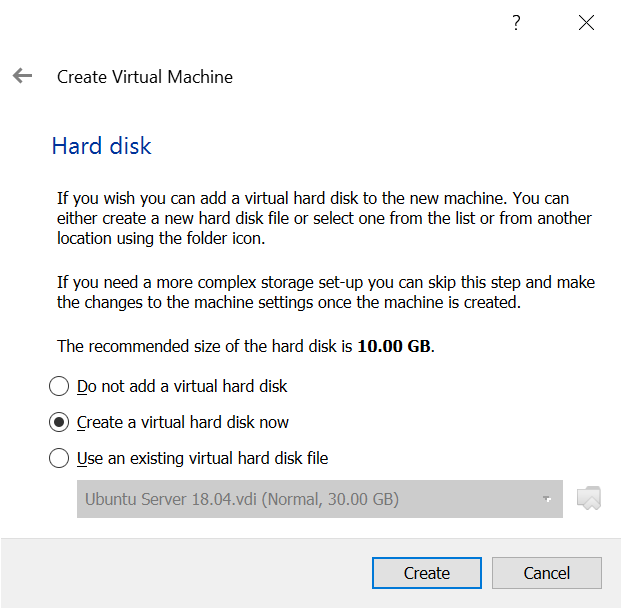
We also need to specify whether to not add a virtual hard disk, use an existing one, or create a new one. We can always attach or remove virtual hard disks to the virtual machine later. Virtual hard disks can be increased in size as well depending on their type.
For now, select "Create virtual hard disk now" and click create.
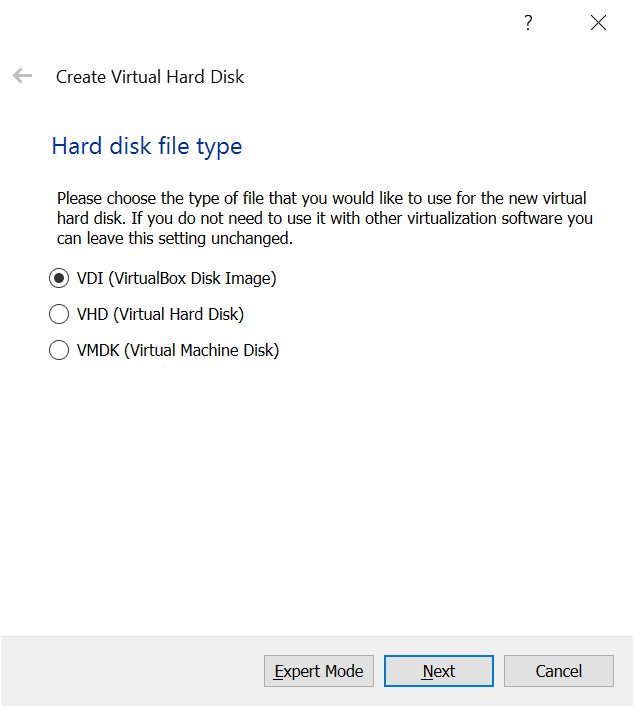
Step Five: Hard Disk File Type
Now we can specify the hard disk file type. There are three types to choose from. If you use other virtualization software, it may be a good idea to select a type used by more than program.
VirtualBox Disk Image (VDI) is the default VirtualBox hard disk file type. Virtual Hard Disk (VHD) can be used by Microsoft virtualization software, like Hyper-V. Virtual Machine Disk (VMDK) can be used by VMware player.
Click next to go the "Storage on physical hard disk" screen.
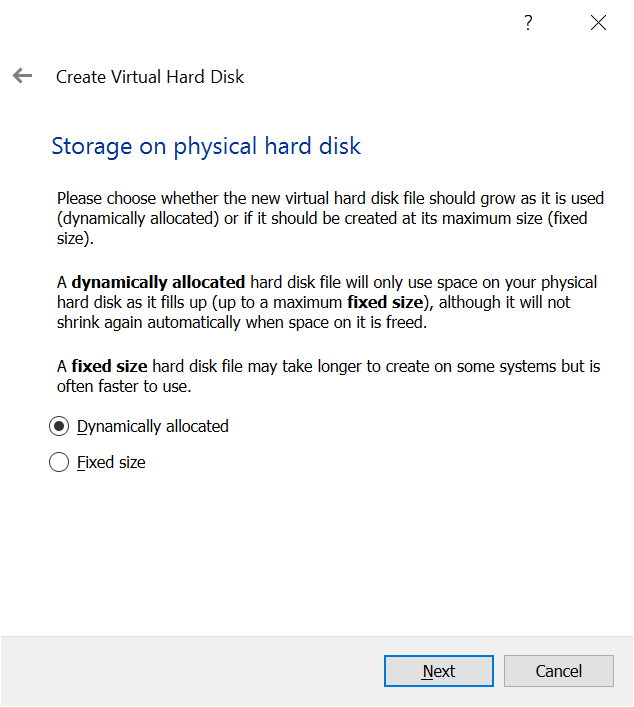
Step Six: Storage on Physical Hard Disk
After selecting the file type, you need to specify whether the disk is fixed size or dynamically allocated. Dynamically allocated disks only grow as the guest uses space up to the specified size and is faster to create. The fixed disk size uses less overhead and immediately occupies the specified size but takes longer to create.
We can increase the size of dynamically allocated disks later as needed. The size for fixed disks can't be increased according to the manual. However, we can attach or remove virtual hard disks to the virtual machine as needed.
For now, select dynamically allocated and click next.
Step Seven: File Location and Size
Finally, we need to name the virtual hard disk and select the size for the disk. The default value is 10 GB. We can also select a different folder to create the file in.
Depending on the operating system you want to install, the default 10 GB storage may not be enough. The default 10GB storage is significantly lower than the Ubuntu Desktop's recommended space. This default works fine if you are just trying the operating system.
Click create to finish the virtual machine creation. If you selected the fixed disk option earlier, the creation process will take longer depending on the size you chose.

Change the Default Settings
Now that we have allocated a virtual hard disk for our virtual machine, we can change the virtual machine's settings. For example, we can change the RAM allocated to the machine, available network adapters, and many other settings. We will only make a few changes.
In order to install or try an operating system in our machine, we need to add an optical disk image to load the live CD/DVD image we downloaded earlier. We are also going to change the network devices to allow communication between the guest and host operating systems.
Step Eight: Select an Optical Disk Image to Load
Begin by clicking on the settings button.
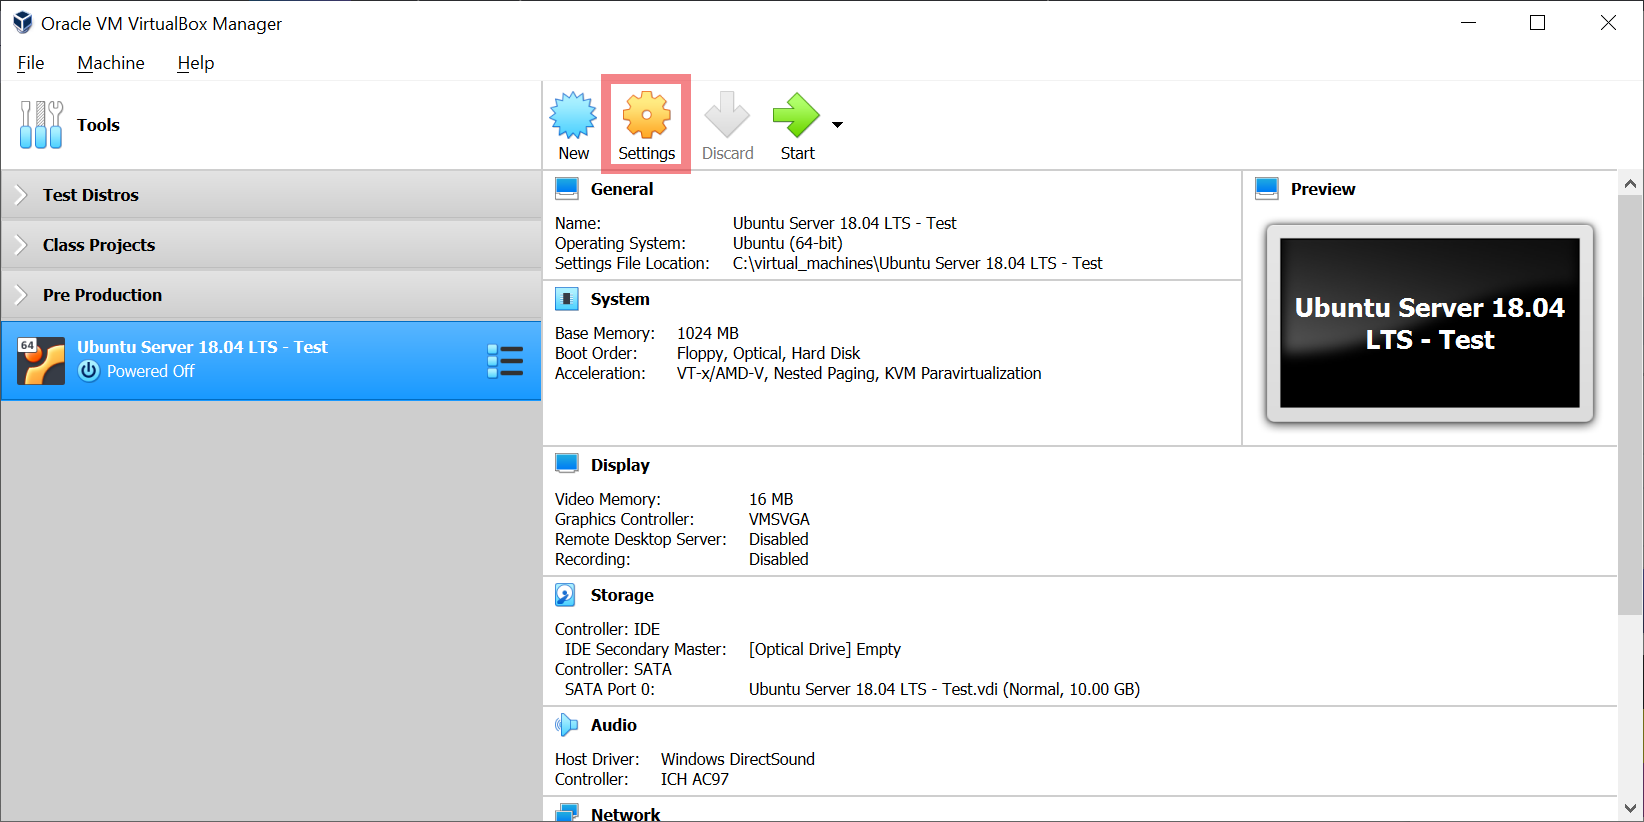
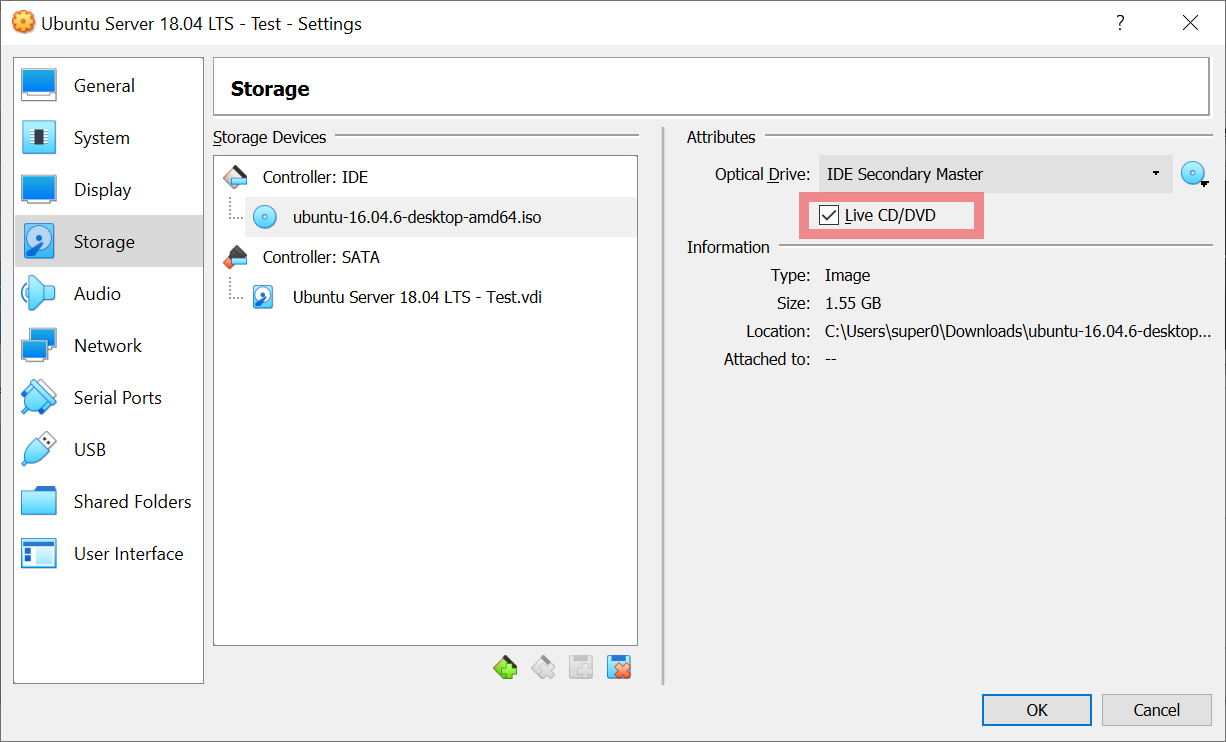
Once the settings menu pops up, click on the "Storage" menu. In this menu we can add/remove storage controllers. The available storage controllers are Floppy, IDE, NVMe, SAS, SATA, SCSI, and USB.
IDE and SATA controllers were automatically added earlier when we created the virtual machine. Optical drives and hard disks can be added to or removed from storage controllers. The hard disk we created earlier was automatically attached to the SATA controller.
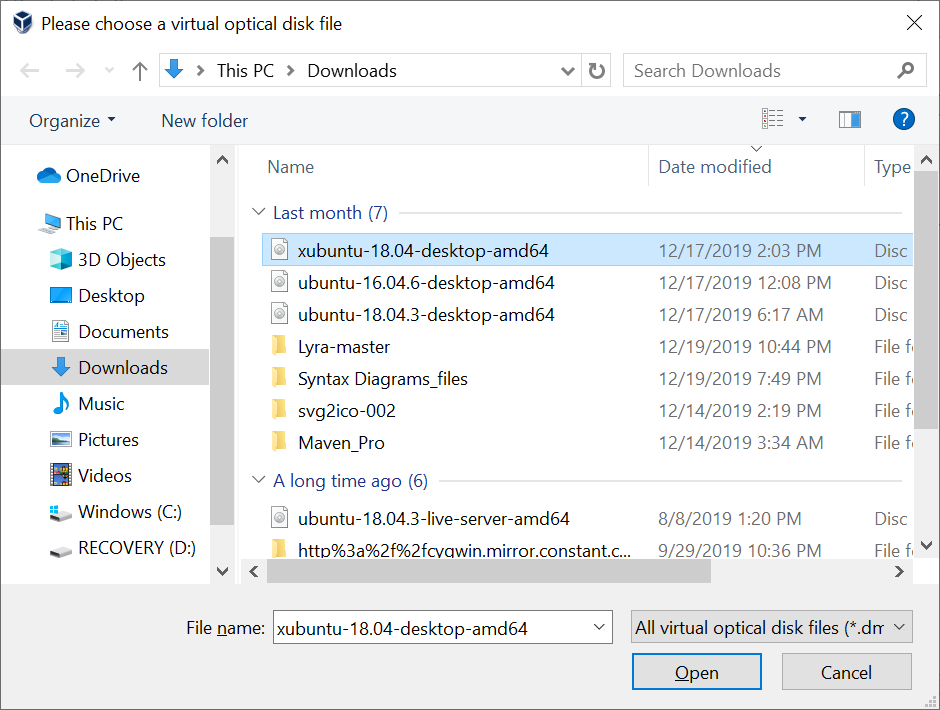
We just need to load the live image we downloaded earlier into the empty optical drive. Click on the "Empty" disk icon and then click on the disk icon (highlighted in red in the image below) and select "Choose Optical Disk File".
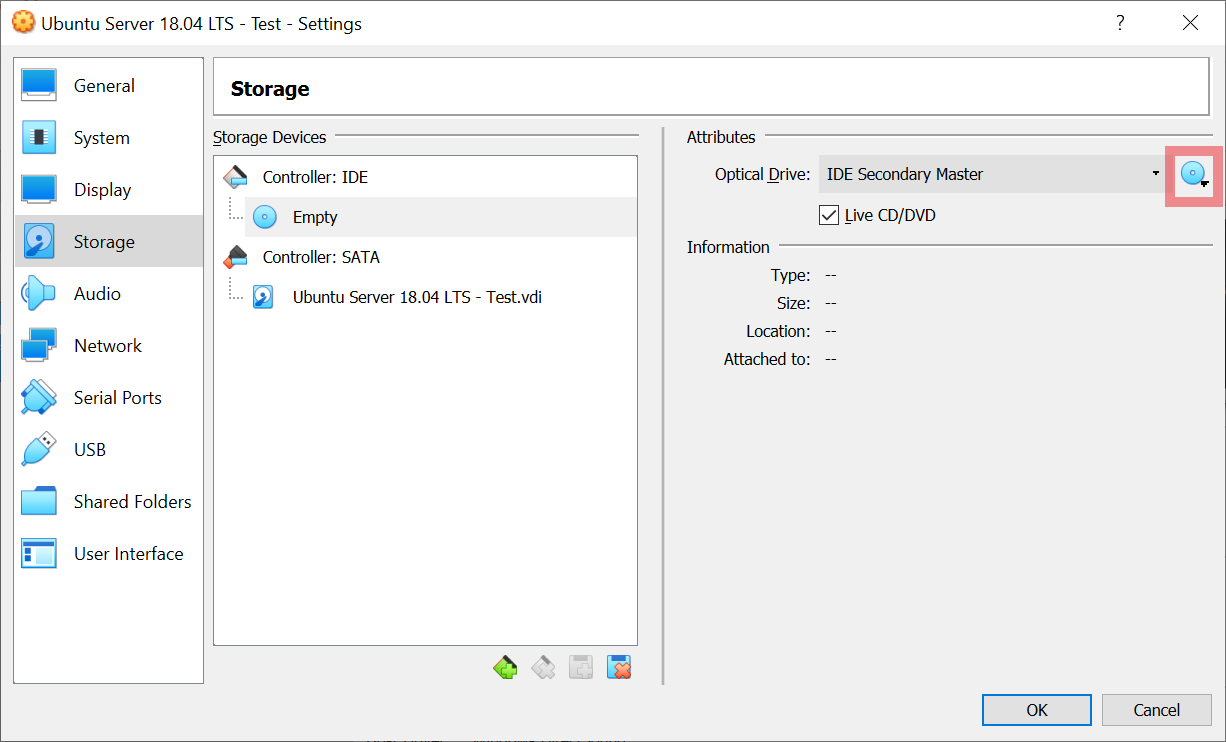
In the next menu choose the virtual disk file you downloaded earlier and click open.
The virtual disk file will be loaded onto the optical drive now. Be sure to check the "Live CD/DVD" option. Now, we can load the live CD to install Ubuntu server.
Step Nine: Change the Attached Network Adapters
The last thing we will change in the settings is the attached network adapters. The available network adapters are NAT, NAT Network, Bridged, Host-Only, Internal Network, and Generic Driver. The default network adapter attached at creation is NAT.
NAT works fine for accessing external networks from the virtual machine. But, the host and other computers on the network can't access the guest's network services. Since we are installing a server, we need another solution for the host to communicate with the guest.
The Host-Only adapter allows the host and other virtual machines to talk with the guest, but not with external networks. The Bridged adapter allows communication between the host and the guest and can connect to external networks. We can have up to eight network cards attached to the virtual machine.
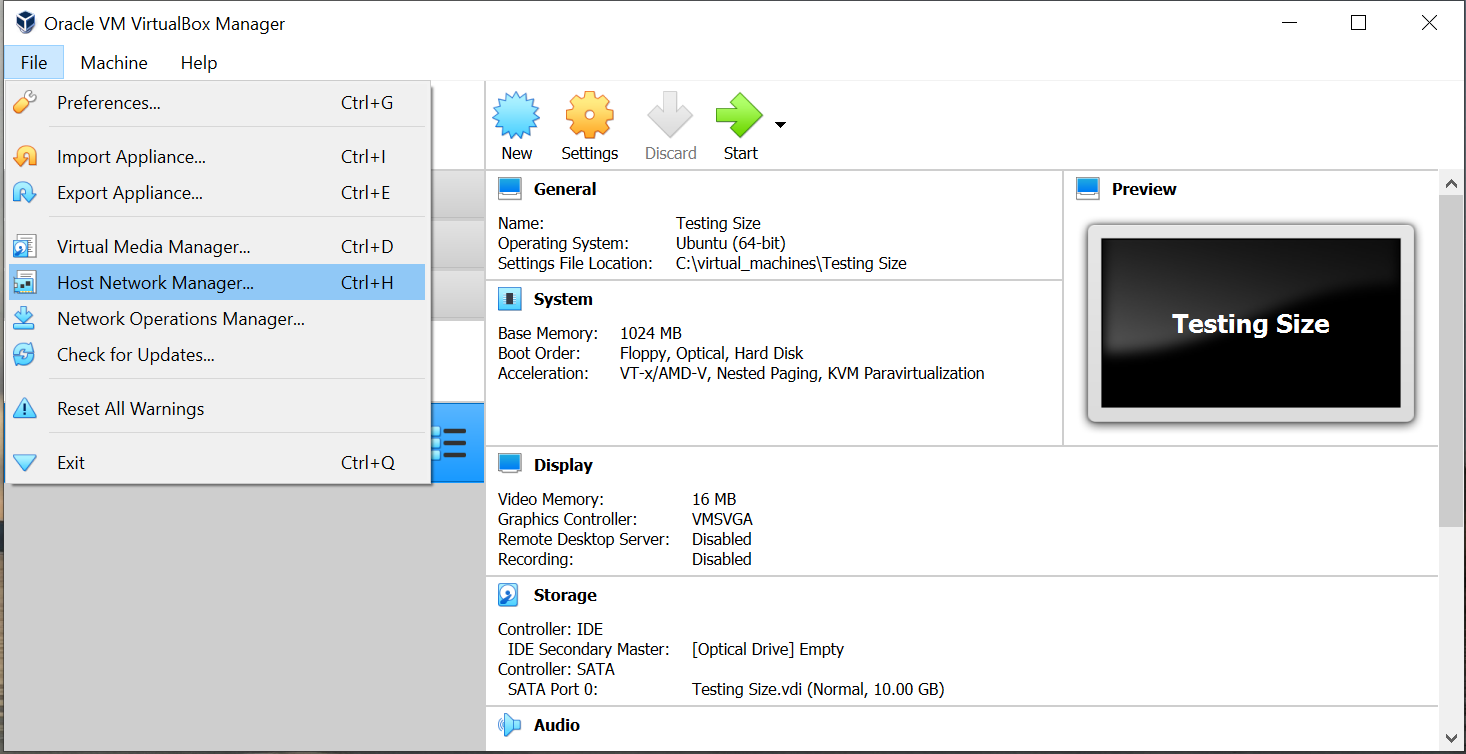
First, we need to add a Host-Only network. Go to file then click "Host Network Manager"
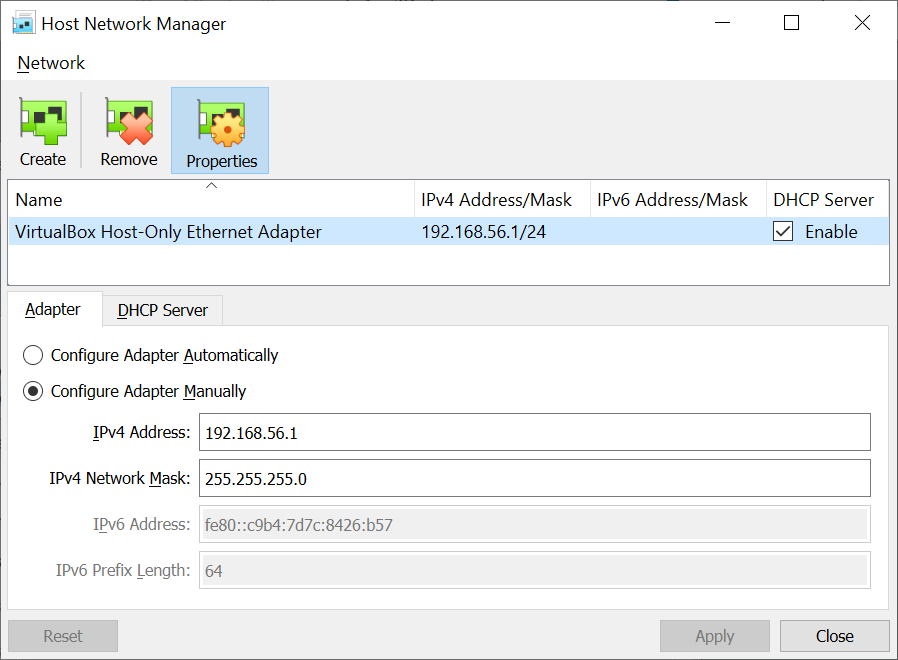
In the Host Network Manager click create. If you need a static IP address for the Host-Only network, the adapter can be configured manually. A DHCP Server for the Host-Only network can also be enabled.
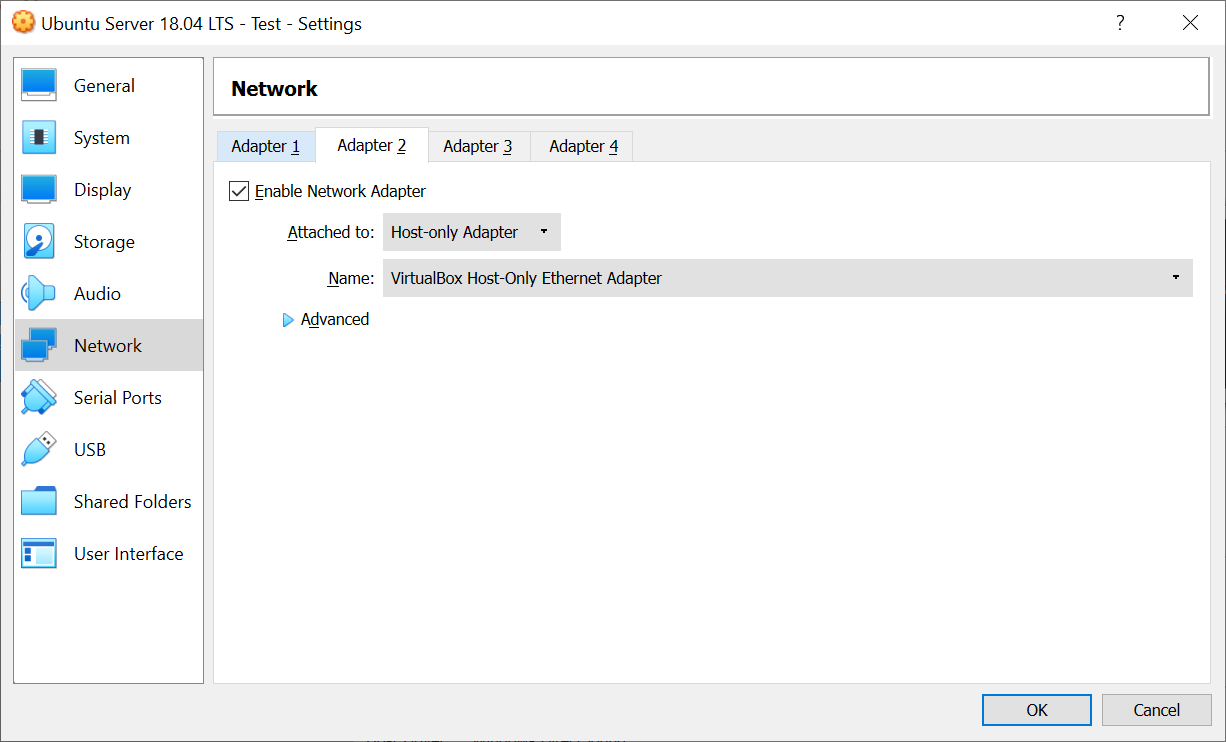
Now we will change the network adapter settings to use the Host-Only and Bridged adapters. Click on the Adapter 1 tab and change the "Attached to" option to Bridged Adapter. Be sure the "Enable Network Adapter" option is checked.

Next, click on the Adapter 2 tab and check the "Enable Network Adapter" option. Change the "Attached to" option to Host-Only Adapter. Click the "OK" button to accept and close the settings menu.
That's it! We are done setting up the virtual machine. We are ready to start up the virtual machine.
Start Up the Virtual Machine and Run the Ubuntu Live CD/DVD
After setting up the machine, we can start up the machine to try or install the operating system on the live CD/DVD loaded earlier. We can always go back to settings and change the live CD/DVD image to a different image.
Step Ten: Virtual Machine Start Up
Click the start button on the VirtualBox Manager menu.
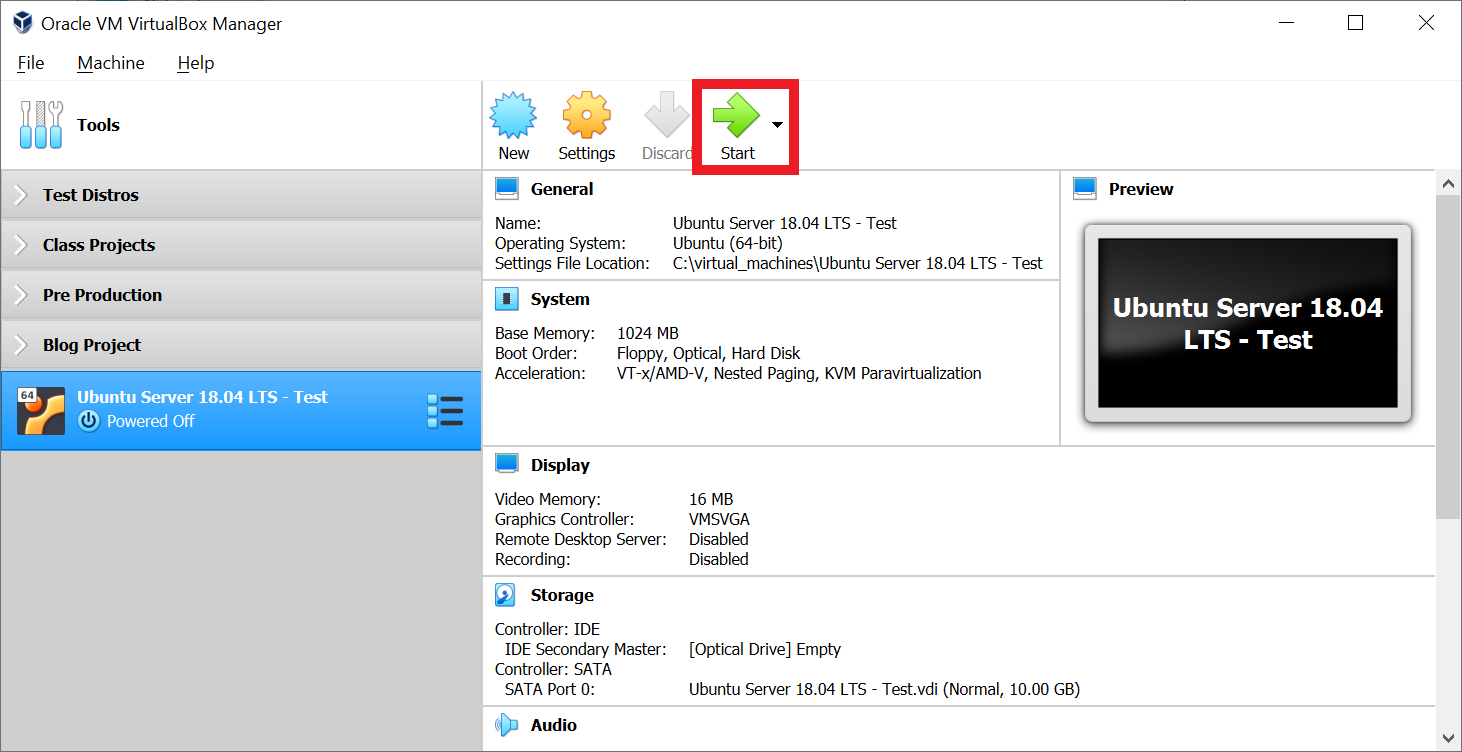
We should see the virtual machine booting up and load the live CD/DVD.
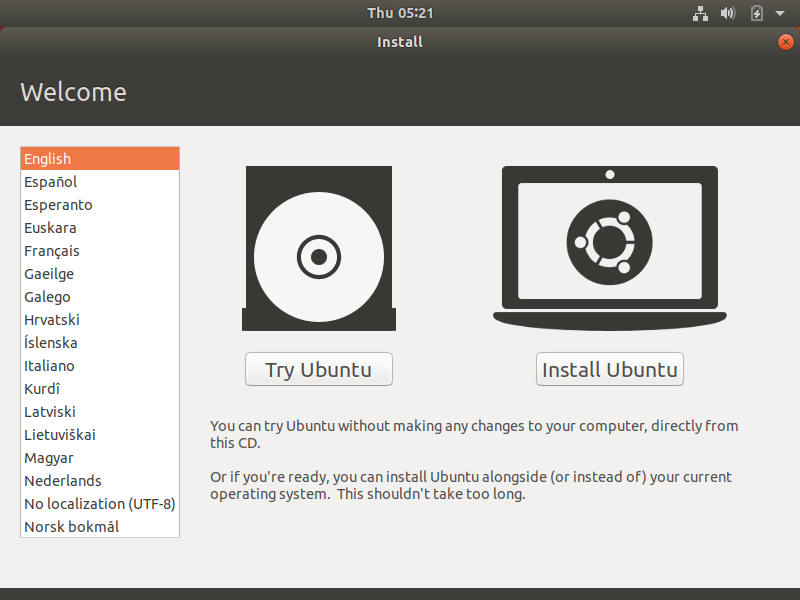
From here we can try or install Ubuntu Desktop to the virtual hard disk. We did it! We can start enjoying this open source goodness.
Conclusion
We created a virtual machine with dynamically allocated virtual hard disk in VirtualBox. We also changed the default settings to allow the host and guest to communicate. Finally, we ran the live CD/DVD to try or install Ubuntu Desktop.
This is only the beginning for using VirtualBox. Next time we'll setup a LAMP server on Ubuntu Server 18.04.